最新の投稿
コメントできるように追加
左にある項目をクリックしたサイトの下方に
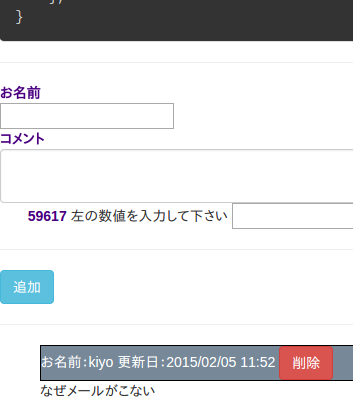
のように表示される。
実験中なので、今は即座に表示されるが、管理者は削除する事ができます。
なのでスパムと判定したら勝手に削除します。
将来は、管理者の判定で表示するように変更するかも知れません。
UbuntuServer 14LTSへデプロイ
作りかけだけどデプロイしてみた。(本サイト)
MeteorをCentOSにデプロイする を参考にやってみる。
$>cd kiyoSite
$>meteor build .
~/kiyoSite/kiyoSite.tar.gzができた
出来上がった kiyoSite.tar.gz を別のPC(これも UbuntuServer 14LTS)へコピーして解凍する。
~/bundle と言うフォルダーができた。
$>cd bundle/programs/server
npm install
参考サイトをみるとエラーが出るみたいだが、、、
$>cd ~/bundle
node main.js

~/bundle/programs/server/node_modules/fibers/future.js:173
                        throw(ex);
                              ^
Error: MONGO_URL must be set in environment
    at Object.<anonymous> (packages/mongo/remote_collection_driver.js:41:1)
    at Object.defaultRemoteCollectionDriver (packages/underscore/underscore.js:750:1)
    at new Mongo.Collection (packages/mongo/collection.js:98:1)
    at packages/accounts-base/accounts_common.js:141:1
    at ~/bundle/programs/server/packages/accounts-base.js:216:4
    at ~/bundle/programs/server/packages/accounts-base.js:1657:3
    at ~/bundle/programs/server/boot.js:205:10
    at Array.forEach (native)
    at Function._.each._.forEach (~/bundle/programs/server/node_modules/underscore/underscore.js:79:11)
    at ~/bundle/programs/server/boot.js:116:5
うん、Error: MONGO_URL must be set in environmentが出ている。
ひょっとしてこのままOKかも?
$>cd ~/bundel
$>vi start.sh
start.sh の中身 -- 今回はテストなので簡単に
export MONGO_URL='mongodb://localhost:27017/kiyoSite'
export ROOT_URL='http://localhost'
export PORT='3200'
forever start main.js
あ、forever は事前にインストールしている。
$>sudo npm install -g forever
start.shに実行権限を与えて
chmod +x ./start.sh
sh ./start.sh
あら、一発で立ち上がった。
以前やった時は色々 npm install デンデンやらなければ、エラーばかりだったのだが、、、
以前と違う事は、 nodejsを apt-get した。 エラーでまくりの環境は nodejsは NVMを使ってインストールしていたから?
"デプロイして思う事、これ meteor を nodejsで起動できるようにしているのでソース覗いてもワケワカメ
ソースを少し変更してもう一度デプロイとかやりにくそう
meteor で作った ~/kiyoSite/pubulic/images フォルダーへ作ったイメージファイルは ~bundle/programs/web.browser/app/imagesにある。
これを <img src="/images/hoge.png" /> とかで参照できてる。
なぜだろう?
新しく作成したい場合どこへ入れる?"
Meteor は簡単にwebサイトが作れるがメンテは難しいかな?
CollectionFSの使い方
最初にお断り、自分は英語わかりません。
説明を機械翻訳してよんだので、間違っているかも知れません。
プロジェクトの作成
meteor create testCollectionFS
cd testCollectionFS

いつものようにパッケージを読み込みます。
meteor add cfs:standard-packages
meteor add cfs:filesystem

画像を縮小する場合は
meteor add cfs:graphicsmagick
testCoolectionFS.html
<head>
    <title>testCollectionFS</title>
<head>
<body>
  <h1>testCollectionFS Test</h1>
   {{> myForm}}
</body>
<template name="myForm">
    <input type="file" class="myFileInput" name="files[]" multiple />
<template>
testCollection.js 画像関係の場合。
1  var Images = new FS.Collection("images",
2    stores: [
3    new FS.Store.FileSystem("images"),{path: "~/upload"}, {
   // 3の {path: "~/upload"} と書くことによって~/uploadフォルダーに読み込んだ画像が格納されます。
   // {path: "~/upload"} を書かないと testCollectionFS/.meteor/local/cfs/files/imagesに保存される。リサイズされた画像は testColletionFS/.meteor/local/cfs/files/thumbsに。
4    new FS.Store.FileSystem("thumbs",{
   //4の"thumbs"の後に "thumbs",{path:"~/upload/thumbs"}と書くと
   //13 gm(readStream).resize(180).stream('PNG').pipe(writeStream);でリサイズされるはずの画像はリサイズされない(ばぐ?)
5       beforeWrite: function(fileObj) {
6         return {
7           extension: 'png',
8           type: 'image/png'
9         };
10       },
   // 5~10はリサイズすると同時に png画像へ変換する。この時 要13のstream('PNG')とする事。 stream()とすると壊れたpng画像が格納された。
11      transformWrite: function(fileObj, readStream, writeStream) {
12        // Transform the image into a 10x10px thumbnail
13        gm(readStream).resize(180).stream('PNG').pipe(writeStream);
14     }
   // gm を使うため GraphicsMagick をインストールしろとあったので ubuntuserver 14.04 LTSでは、sudo apt-get install graphicsmagick をした。
15    })
16  ],
17  filter: {
18    allow: {
19      contentTypes: ['image/*'] //allow only images in this FS.Collection
20    }
21  }
22});

23if (Meteor.isClient) {
24  // counter starts at 0

25  Template.myForm.events({
26    'change .myFileInput': function(event, template) {
27      FS.Utility.eachFile(event, function(file) {
28        Images.insert(file, function (err, fileObj) {
29          //Inserted new doc with ID fileObj._id, and kicked off the data upload using HTTP
30        });
31      });
32    }
33  });
34}

35if (Meteor.isServer) {
36  Meteor.startup(function () {
37    // code to run on server at startup
38  });
39}
テキストファイル関係では
testCollectionFS.html
<input type="file" class="myFileInput" name="files[]" multiple />
を
<input type="file" class="myFileInput" name="files[]" />
と multipleをはずした。
testCollectionFS.js
var eventPhotosStore = new FS.Store.FileSystem('eventPhotos', {
  path: '~/uploads/full'
});

eventPhotos = new FS.Collection('eventPhotos', {
  stores: [eventPhotosStore]
});

events = new Meteor.Collection('events');

if (Meteor.isClient) {
  Template.myForm.events({
    'change .myFileInput': function(evt) {
      var file = evt.target.files[0];

      var fileObj = eventPhotos.insert(file);

      console.log('Upload result: ', fileObj);
      events.insert({
          name: file.name,
          file: fileObj
       });

    }
}
のように使うようだ、
簡単にファイル操作ができるようだが、自分のほしかった機能( ローカルのファイルを読み込んで moongodb へ格納する )ではないようだ。
<input type="file" class="myFileInput" name="files[]" multiple />
で multiple は複数同時にファイルを読み込んでくれるので便利ではあるが、メモリーの関係かハングしたようになる場合があるようだ。
meteor に組み込みのminimongodb のコマンド
meteor で使われるデータベース名は meteor で起動中に別 Shell から meteor mongoで起動する。
mongodbではテーブルをコレクションと言う Json形式で値を受け渡しする。
インサート文
db.collection.insert( { name: 'hoge', comment: 'memo', createAt: new Date() } );
  // _idは自動で追加される。 primary keyになる。
アップデート文
db.collection.update( {name: 'hoge'}, {$set: {comment: memo1}} );
 // nameフィールドの'hoge'を検索して comment フィールドを memo1 へ変更している。
 // 複数項目更新するには ,{multi: true}を追加する
db.collection.update( {name: 'hoge'}, {$set: {comment: memo1, comment2: memo2 },{multi: true}} );
削除文
db.collection.drop();      // コレクション自体も削除される。
db.collection.remove(); // コレクションの中身が削除される。
検索文
db.collection.find();   // 古い順に全て検索
db.collection.find( {}, {sort: {createAt: -1}, skip: 0, limit: 30} );
// 「createAt: -1」 は書き込み日付の新しい順に 「skip: 0」は先頭から0を10にすると10件分よみ飛ばす 「limit: 30」 30件分検索
db.collenction.find( {name: 'hoge'} );  // select from collection where name='hoge'
db.collection.find( {name: '/hoge/'} ); // select from collection where name LIKE '%hoge%'
db.collection.find( {a: 1, b: 2} );            // select from collection where a=1 AND b=2
db.collection.find( { a: { $gt: 1} } );      // select from collection where a>
db.collection.find( { a: { $gt: 1}, b:{ $lt: 2} } );     // select from collection where (a>1 AND b<2)
db.collection.find( {$or: [a: { $gt: 1}, b:{ $lt: 2}] } );       // select from collection where (a>1 OR b<2)
ちなみに以下のようだ
  $gt  >
  $lt  <
  $ne  !=
  $gte >=
  $lte <=
  $or  OR
カウント数
db.collection.count(); // select COUNT(*) from collection
db.collection.find( {a: {$gt: 1}} ).count();
リミット
db.collection.findOne(); // select from collection LIMIT 1
db.collection.limit(5); //select from collection LIMIT 5
ダンプとリストア ( minimongodb に使えるのかは不明 )
mongodump --out mongodb.backup //全てのデータベースをバックアップ
mongodump --db collection --out collection.backup // 任意のデータベースをバックアップ
mongorestore --drop mongodb.backup // リストア
公開時に危険な insecure パッケージとautopublishパッケージの削除及びその対処方法
insecureパッケージ
削除方法:
meteor remove insecure
よくある解説書にはクライアントからサーバへ書き込みできるので危険とある。
私見であるが、クライアントのブラウザーコンソールで色々なコマンドが実効できるのが危険と言う事かな?
こんな対処法をよく見かける
if (Meteor.isServer) {

  Messages.allow({
    insert: function (userId, doc) {
      return true;
    },
    update: function (userId, doc) {
      return true;
    },
    remove: function (userId, doc) {
      return true;
    }
  });
server側で true を返せば実効可能と言う事なんだろう
false を返せば実効できなくなる。
client 側から Meteor.call(...)で呼び出し
server側で Meteor.methods(...)を作って処理方法を書くようだ。
insertの処理
server 側
Meteor.methods({

  postInsert: function(postAttributes) {
    check(Meteor.userId(), String);
    check(postAttributes, {
      title: String,
      url: String
    });
    var user = Meteor.user();
    var post = _.extend(postAttributes, {
      userId: user._id,
      author: user.username,
      submitted: new Date()
    });
    var postId = Posts.insert(post);
    return {
      _id: postId
    };
   }
 });
insertするためにはpostAttributesを継承して要素を追加し、check関数でチェックする。
client側
var post = {
   url: $(e.target).find('[name=url]').val(),
   title: $(e.target).find('[name=title]').val()
};

//post._id = Posts.insert(post);
//Router.go('postPage', post);
Meteor.call('postInsert', post, function(error, result) {
 // display the error to the user and about
 if (error)
   return alert(error.reason);
 Router.go('postPage', {_id: result_id});
});
autopublishパッケージ
私見ではあるが、autopublishは常に変更されたかを見張っていてプログラム中は大変便利だが、完成し実効時は無駄な処理に時間とメモリを割いているから?
削除:
meteor remove autopublish
server側
Meteor.publish('messages', function () {
  return Messages.find({}, {sort: {cdate: -1}});
client側
Meteor.subscribe('messages');